Hashnode writer? Create your branded cover images
I create mine in seconds. Here is how you can do just the same.


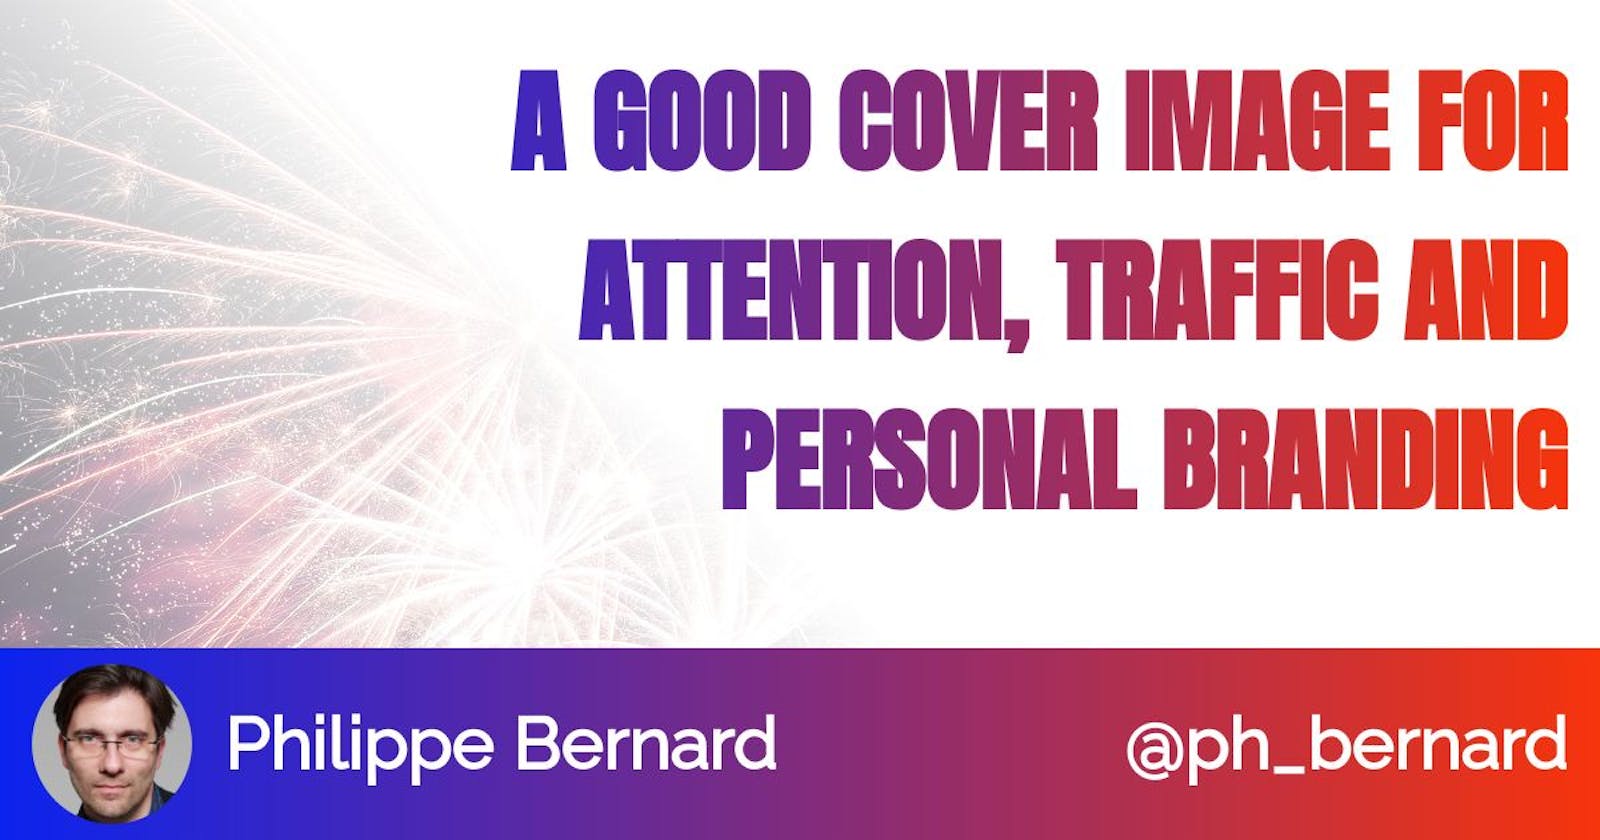
To create my cover image, I visited my own image engine, typed some text and downloaded the result. This article explains how you can do this too.
Why
So you've wrote an article on Hashnode or plan to do so.
It's written. Proofread. The content is amazing. After all, you are an expert in your field. And there's this great story you want to share. You have weighted every word, followed all recommandations. Your article is ready.
But will it be read?
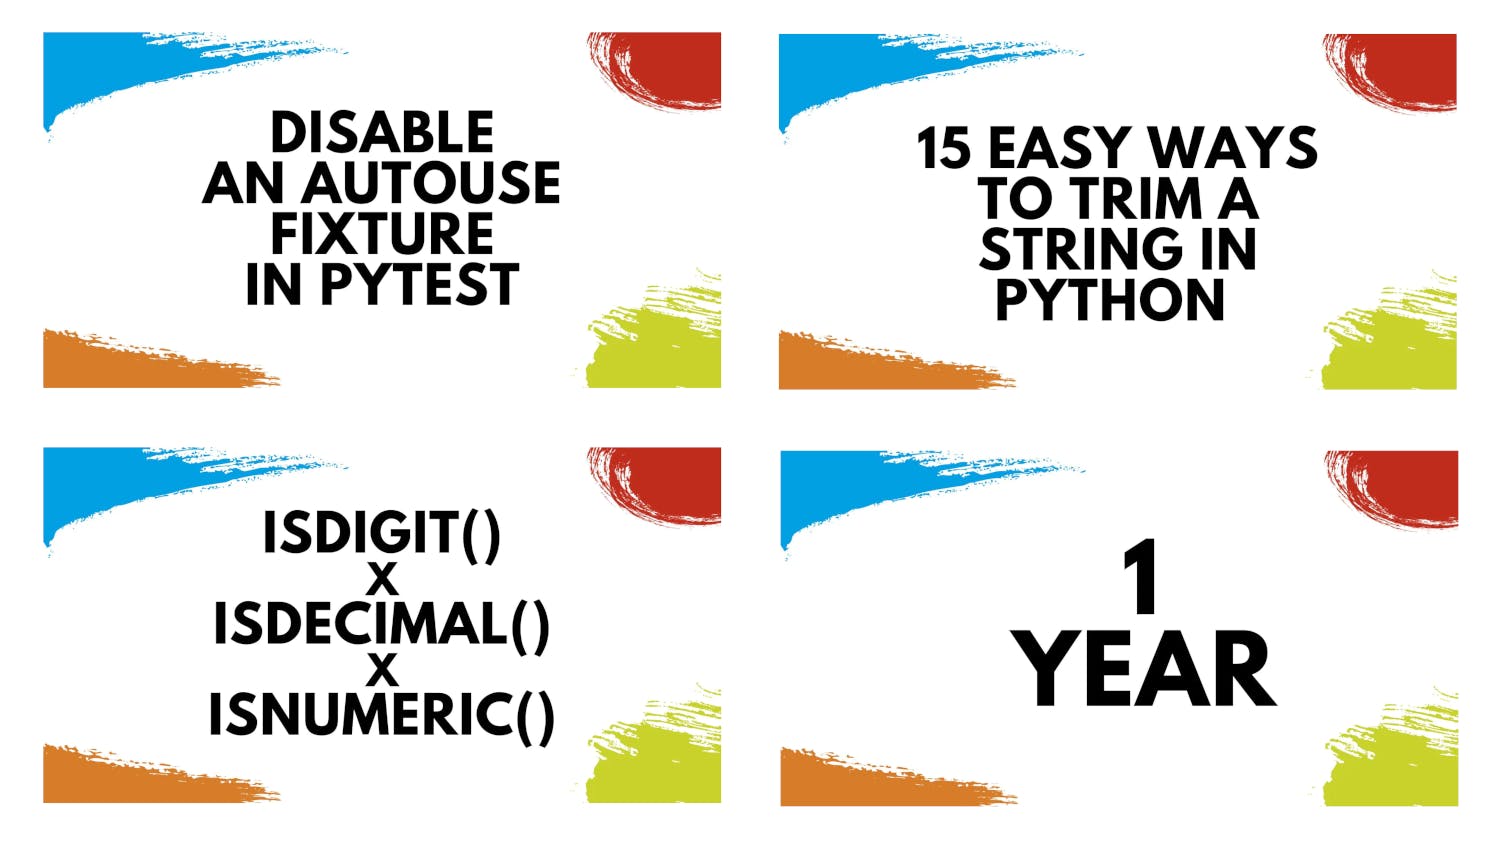
Someone browsing Hashnode will see something like this:
Your article has mainly three elements it can count on to be noticed: the title, subtitle and cover photo. You probably paid attention to the first two already. They are text, just like the content of your article, so it's natural to care about them. What about the cover image?
What
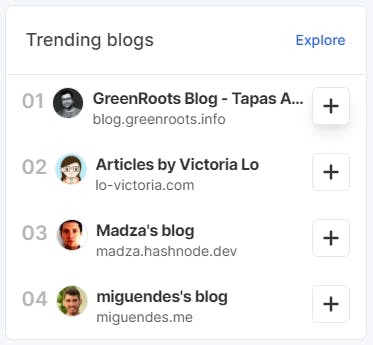
I could pick what I consider bad examples and yell at you not to do the same. But I'm definitely not competent enough to judge fellow writers's choices regarding images. Instead, let's focus on the ones who cracked the system:
What do their cover images have in common?
Tapas Adhikary's embed the post title, have a monochromatic background and share the same "logo and Twitter account" footer:

Victoria Lo highlights her post titles, always using the same font. There are recurrent patterns, such as the macOS bar and the grid background:
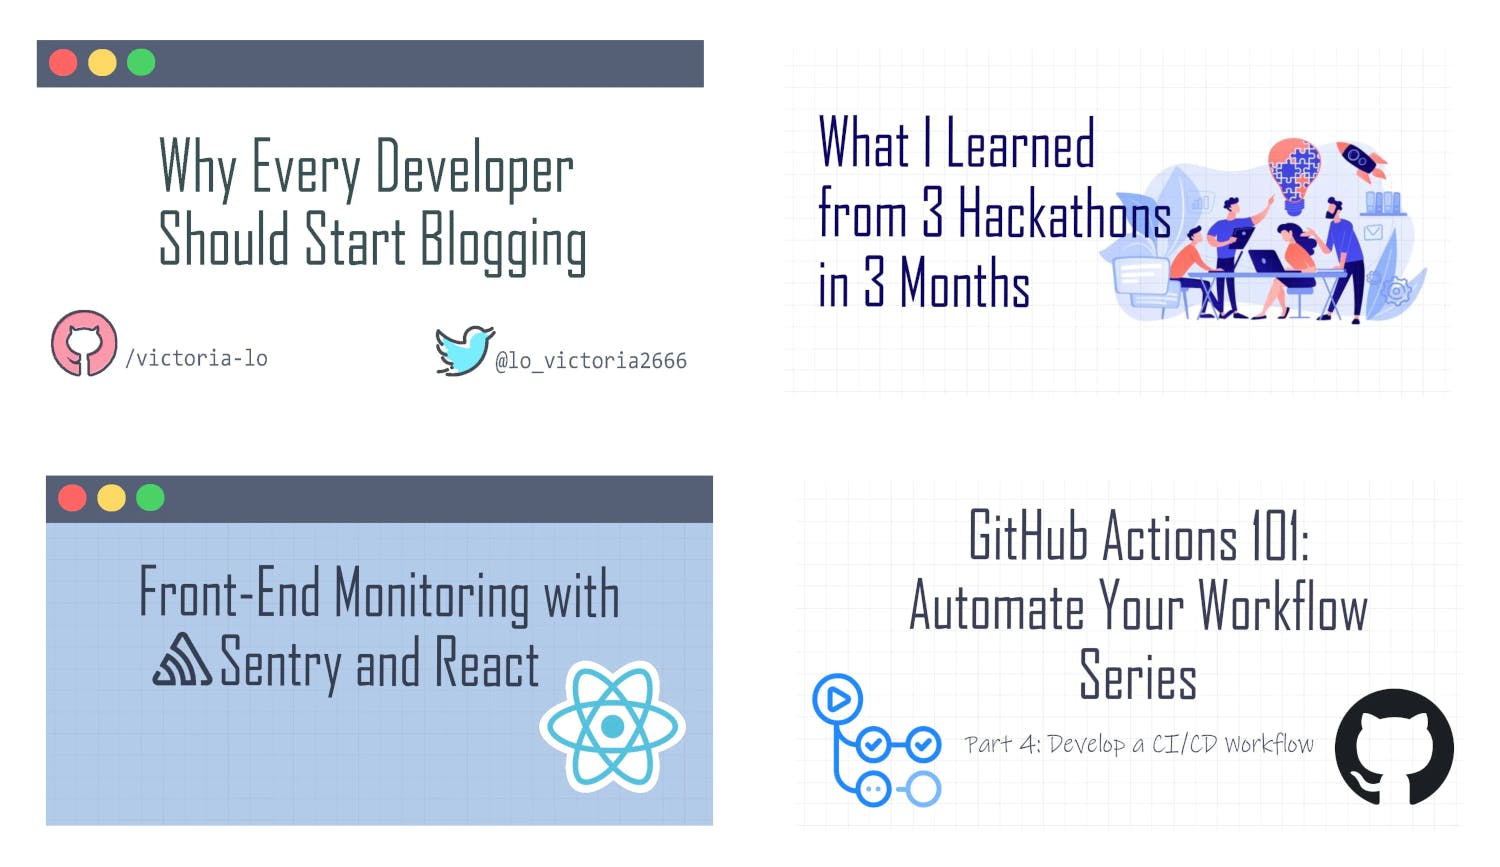
Madza takes beautiful photos and adds a two-parts title as an overlay:

Miguel Brito has created his own template once for all and adds the post title:
What these images have in common:
- Post title: you know what the post it about just by looking at the image.
- Branding: bloggers add their personal brand to their images. Either directly, with a logo, or by using a memorable pattern. For example, I will certainly recognize Madza's "landscape and white, two parts title" next time I see it.
How
We can produce rich cover images with our favorite graphical tool or service, whatever it is Gimp, Illustrator or Canva. Our choice makes this task more or less time consuming, expensive and reproductible.
As developers, we have another option: design an image template once for all with HTML and CSS, and use it every time we write a new article.
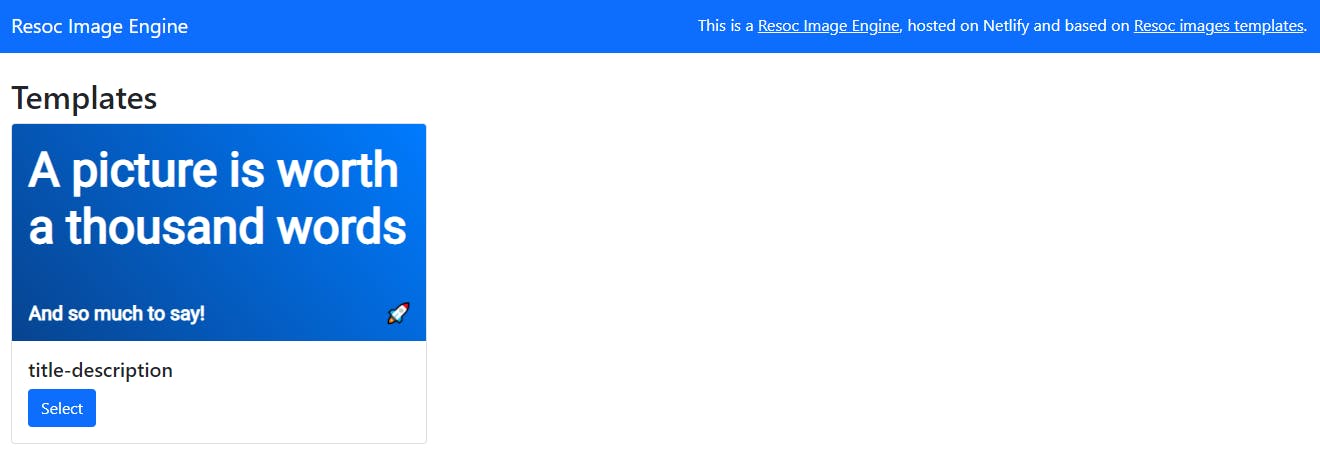
My image engine
When I need a cover image, I visit covers.philippebernard.dev. Here I find two templates I created just for me:
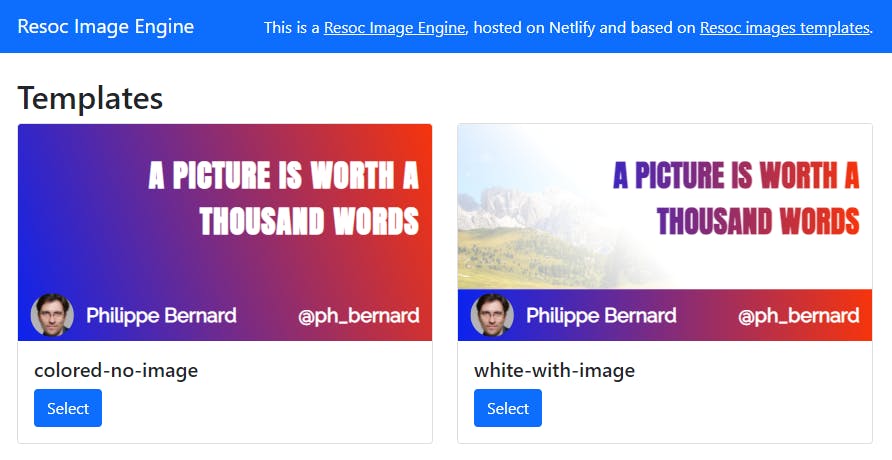
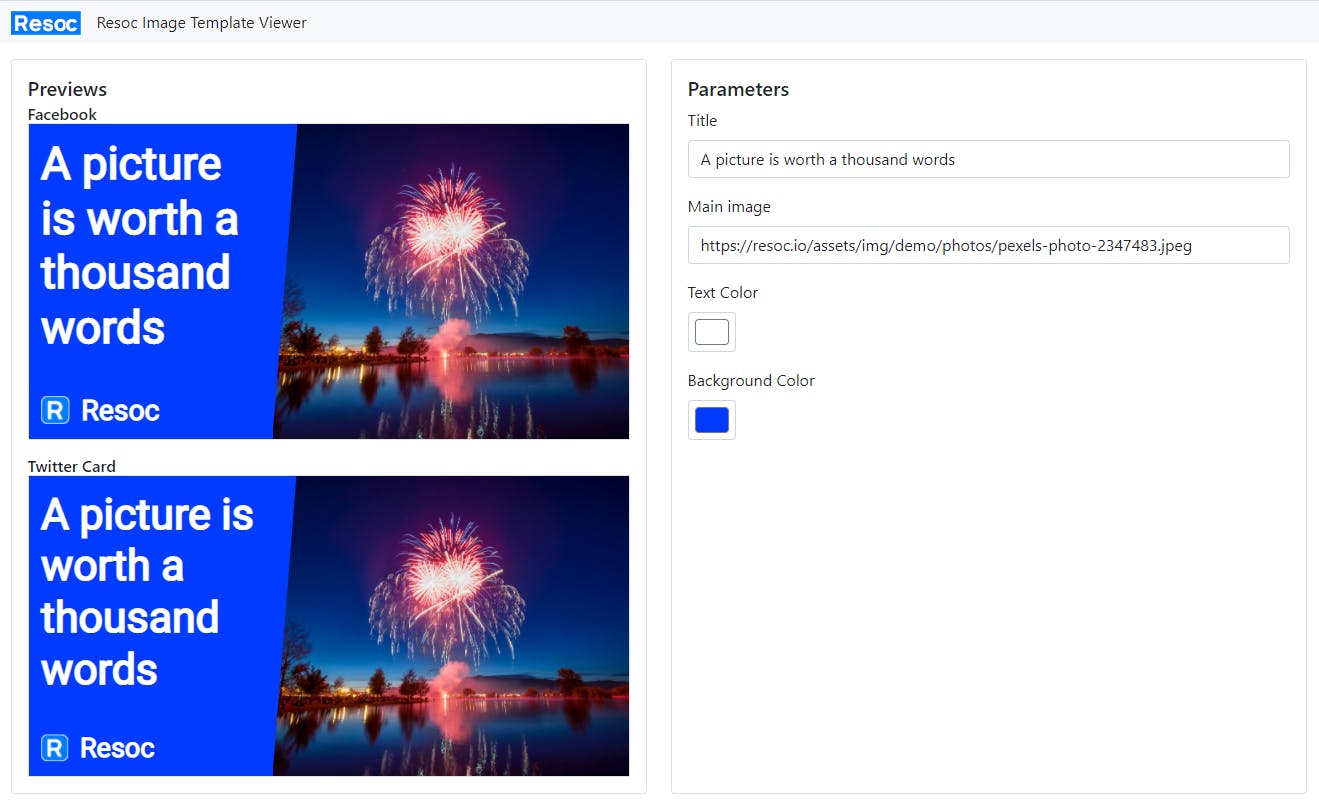
I click the one I prefer for the particular message I want to convey and get an editor:

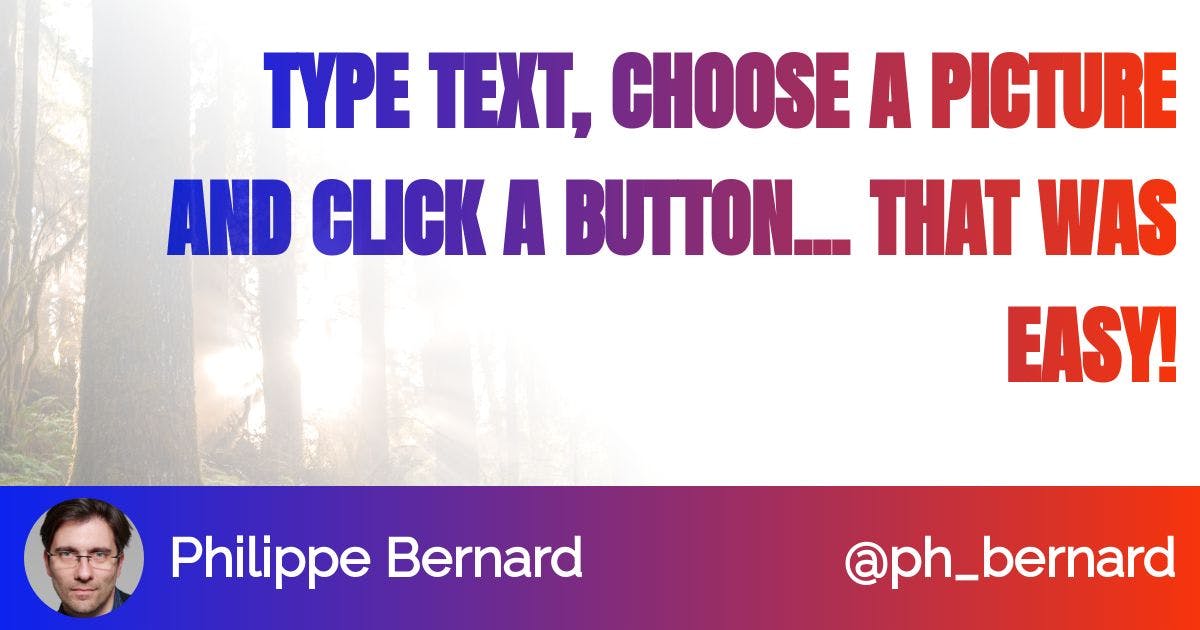
Now all I need is to do is type a title, paste the URL of an image I want to use as a background, and click the "Download" button. This is what I generated as I write this very paragraph:
Let's see how you can deploy your engine and create image templates that match your personality, brand and tone.
Deploy your own image engine
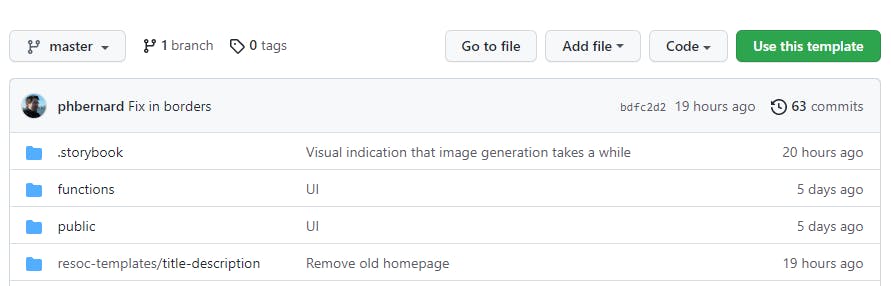
To create your engine, simply use the Resoc Netlify Image Engine as a template. Click the green "Use this template" button:
Choose a name, probably make it private, validate... Congratulations! Your engine is ready.
Now let's deploy it to Netlify. Create a Netlify account or sign in if you already have one.
From your dashboard, create a new site from Git. You don't have to change anything in the settings. The process is fairly easy:
You engine is ready. Visit it, play with it, create your first image!
We are going to replace the default template with our own in a minute. Before that, if you have your own domain name, maybe it's the right time to add a custom domain. You can make it something like covers.myname.me or images.myself.dev:
Create your own templates
Unless your primary color is blue and your logo is a rocket, the default template is unlikely to match your brand 😅
We are going to work on our engine. Clone its repository:
git clone [Your engine GitHub URL]
The blue-with-a-rocket default template is in resoc-templates/title-description. Remove this subdirectory:
cd [Your engine local copy]
git rm -r resoc-templates/title-description
git commit -m "No need for the default template"
Now, create a new template:
npx itdk init resoc-templates/my-template
In this command, itdk refers to the Resoc Image Template Development Kit. It create a new image template we are going to edit. It also opens it in our browser:
Alright, let's modify this template until it matches our needs.
First, we need to decide of its parameters. They are declared in resoc-templates/my-template/resoc.manifest.json:
{
  "partials": {
    "content": "./content.html.mustache",
    "styles": "./styles.css.mustache"
  },
  "parameters": [
    {
      "name": "title",
      "type": "text",
      "demoValue": "A picture is worth a thousand words"
    },
    {
      "label": "Main image",
      "name": "mainImageUrl",
      "type": "imageUrl",
      "demoValue": "https://resoc.io/assets/img/demo/photos/pexels-photo-2347483.jpeg"
    },
    {
      "name": "textColor",
      "type": "color",
      "demoValue": "#ffffff"
    },
    {
      "name": "backgroundColor",
      "type": "color",
      "demoValue": "#003bff"
    }
  ]
}
What should we do about them? It depends. For example, Miguel Brito social images share the same background, and the title is always black:

The only moving part is the title, so he should do:
{
  "partials": {
    "content": "./content.html.mustache",
    "styles": "./styles.css.mustache"
  },
  "parameters": [
    {
      "name": "title",
      "type": "text",
      "demoValue": "A picture is worth a thousand words"
    }
  ]
}
Now, consider Madza's images:
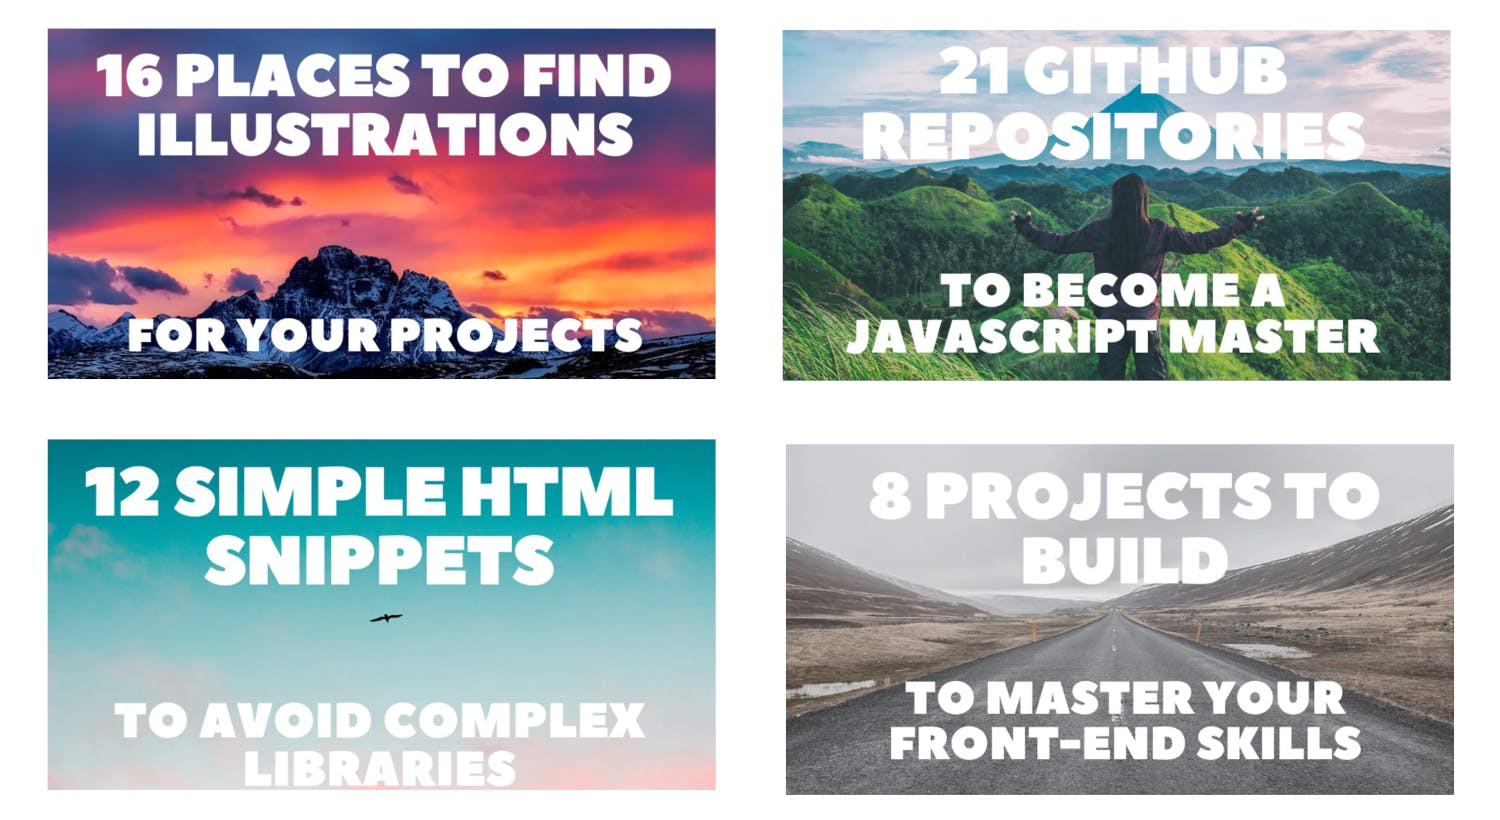
He has three parameters, the top title, bottom title and background image URL:
{
  "partials": {
    "content": "./content.html.mustache",
    "styles": "./styles.css.mustache"
  },
  "parameters": [
    {
      "name": "topTitle",
      "type": "text",
      "demoValue": "A picture is worth"
    },
    {
      "name": "bottomTitle",
      "type": "text",
      "demoValue": "a thousand words"
    },
    {
      "label": "Background image",
      "name": "backgroundImageUrl",
      "type": "imageUrl",
      "demoValue": "https://resoc.io/assets/img/demo/photos/pexels-photo-2347483.jpeg"
    }
  ]
}
Now that your parameters are ready, it is time to use them and design the template. Edit resoc-templates/my-template/content.html.mustache:
<link rel="preconnect" href="https://fonts.googleapis.com">
<link rel="preconnect" href="https://fonts.gstatic.com" crossorigin>
<link href="https://fonts.googleapis.com/css2?family=Roboto:wght@400&display=swap" rel="stylesheet">

<div class="wrapper">
  <div class="side">
    <div class="side-content">
      <h1 id="title">
        {{ title }}
      </h1>
    </div>
    <div class="footer">
      <img class="logo" src="logo.png">
      <h4 class="brand-name">
        Resoc
      </h4>
    </div>
  </div>
  <div class="main">
    <div class="extended-background"></div>
    <img
      class="main-image"
      src="{{ mainImageUrl }}"
    >
  </div>
</div>

<script src="textFit.js"></script>
<script>
  window.onload = function() {
    textFit(document.getElementById('title'), { maxFontSize: 500, multiLine: true });
  };
</script>
This is mainly classic HTML, with a little bit of JS to use textFit, a cool utility to make some text fit its container. But you may notice two unusual sequences, {{ title }} and {{ mainImageUrl }}. This is Mustache, a templating system used to inject parameters in your template.
What about the styles? There are in resoc-templates/my-template/styles.css.mustache. Again, you can use Mustache to access your parameters. For example:
.wrapper {
  background-color: grey;
  display: flex;
  align-items: stretch;
  color: {{ textColor }};
}
The viewer hot reloads your template whenever you edit it, so you can easily check the effects of your recent changes.
The rest is up to you! If you need inspiration:
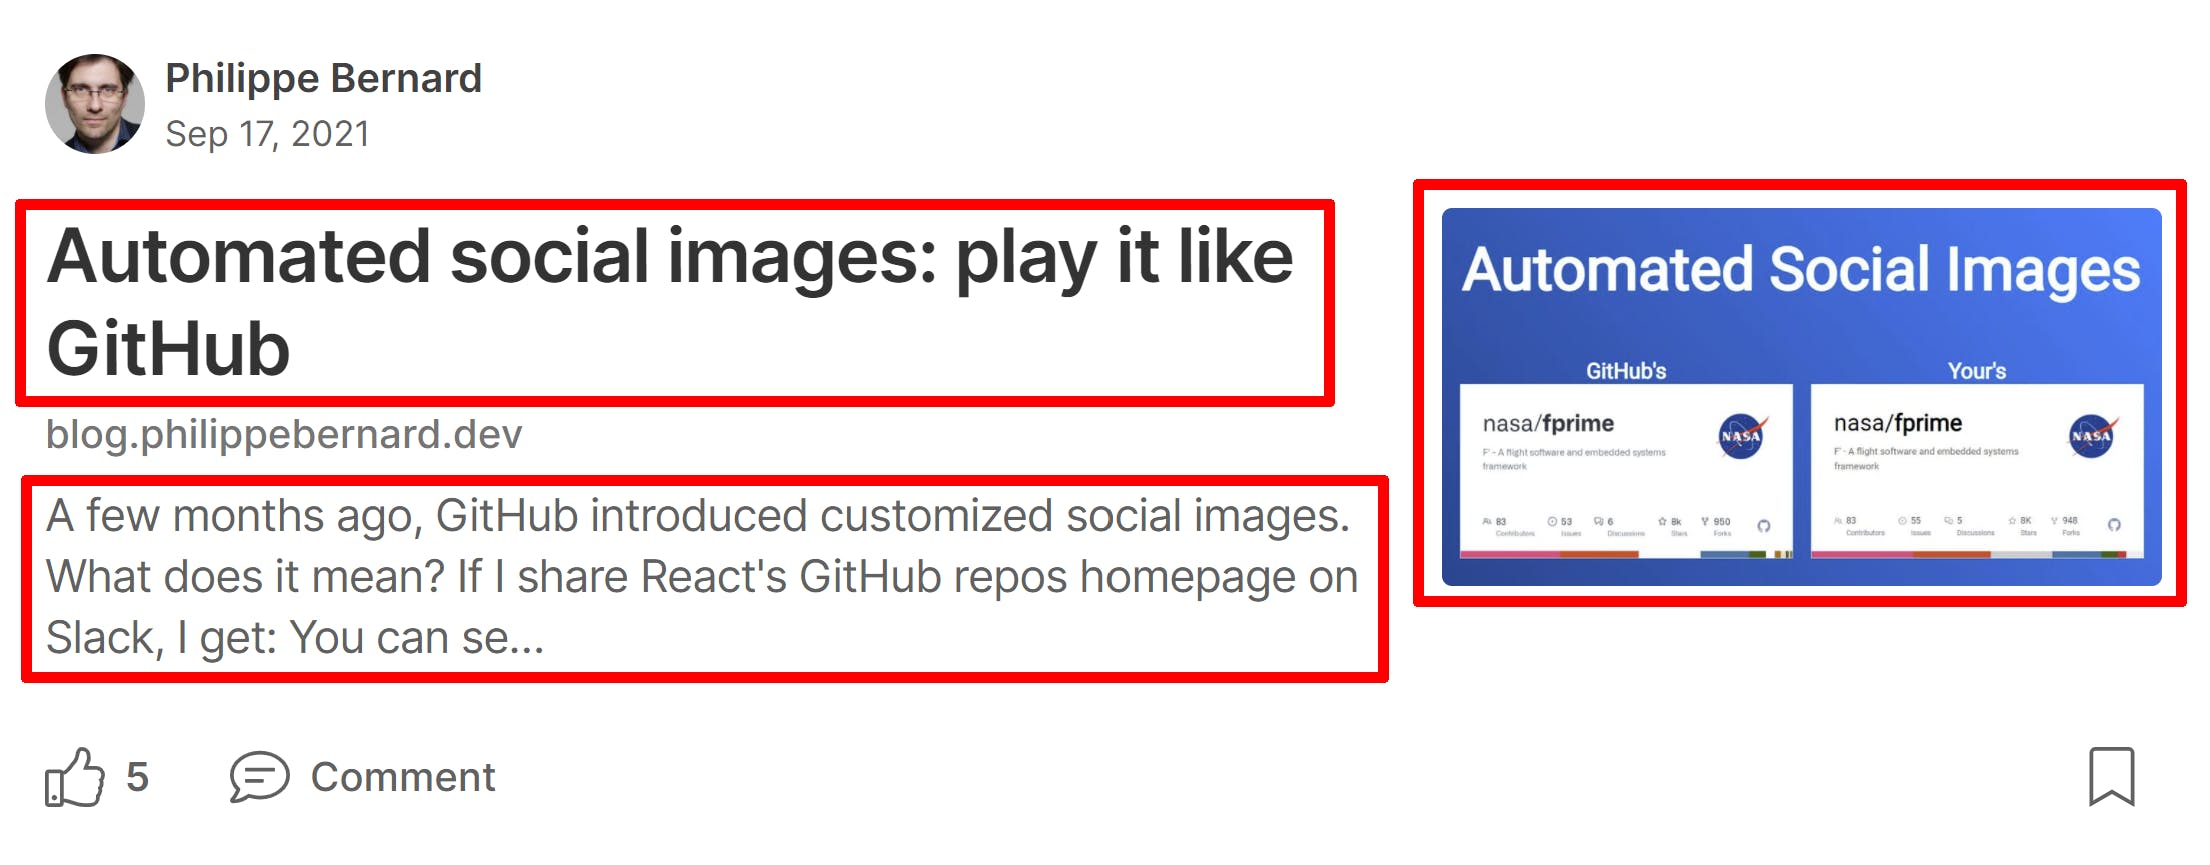
- Have a look to my personal image templates
- For a complex scenario, here is how the GitHub social images can be rewritten with Resoc.
Once your template is ready, deploy it:
git add resoc-templates
git commit -m "My own template!"
git push
Netlify notices the event and deploy your engine again. You can now generate your very own branded social images!
Conclusion
As technical writers, getting readers is not an easy task. As of writing this paragraph, there are something like 50 articles published during the last three days, waiting to be clicked in my news feed. And this is just my Hashnode feed.
Title and subtitle are definitely the #1 reason for a potential reader to pay attention to an article. The cover image should not be neglected, though. It provides another mean to convey our message. And it does something our title can't: establish our personal brand. Top Hashnode writers (and brands in general) are doing it. We should probably do it, too.
With the Resoc image template devkit and image engine for Netlify, we can create awesome social images easily, only using a skill we already have and value: web design.
I'm creating Resoc to address a range of usages, not only Hashnode publishing 😆 If you want to follow up, reach me on Twitter!